🏠 What is MyCRM
MyCRM is a user-friendly CRM system for small and medium businesses that runs entirely within Telegram. No need to install additional software — just open the bot and get started.
Contacts & Clients
Store data about clients, companies, and partners all in one place
Leads & Deals
Track sales through a pipeline with any number of stages
All Messengers
Telegram, WhatsApp, Instagram, and more — in a single window
AI Assistant
Claude AI responds to clients and helps managers
Tasks
Telegram reminders so you never miss a call
Documents
Generate contracts and invoices in seconds from templates
🚀 Registration via Telegram
To get started with MyCRM, you need a Telegram account. The entire process takes less than 2 minutes.
- 1Open Telegram and find the bot @mycrmtop_bot
- 2Press the Start button
- 3Choose your interface language (Ukrainian, Russian, or English)
- 4Press "Create new CRM"
- 5Enter your company name and send the message
- 6The bot will send a confirmation with an "Open CRM" button — press it!
🔑 First Login & Web Version🔗
There are two ways to open the CRM:
Option 1: Via Telegram (recommended)
Press the "Open CRM" button in the bot — the Mini App will open right inside Telegram. Authentication happens automatically.
Option 2: Via Browser
- 1Go to mycrm.top/app
- 2Press "Open @mycrmtop_bot" or go to the bot manually
- 3Send the command
/webloginto the bot - 4The bot will send a 6-digit code — enter it in the form on the website
- 5Press "Log In"
/weblogin command.
📱 Interface Overview🔗
After logging in, the Home page opens with your tasks. Navigation is at the bottom of the screen:
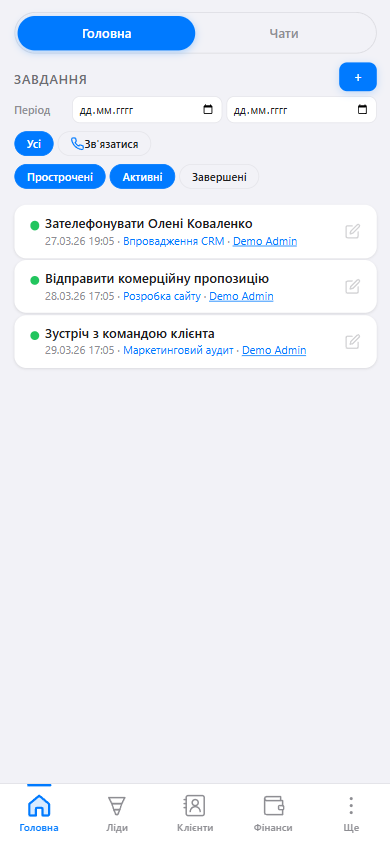
- "Home" and "Chats" tabs
- Bottom navigation bar
| Section | Contents |
|---|---|
| 🏠 Home | Today's tasks, client chats |
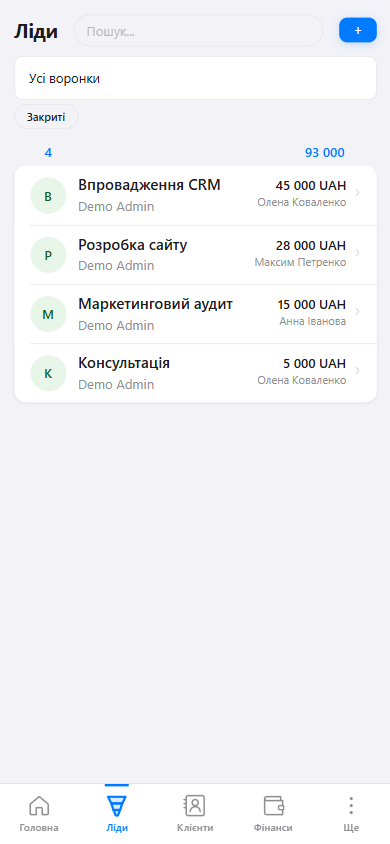
| ▼ Leads | Sales pipeline, deals list |
| 👥 Clients | Contacts and companies |
| 💰 Finances | Income, expenses, analytics |
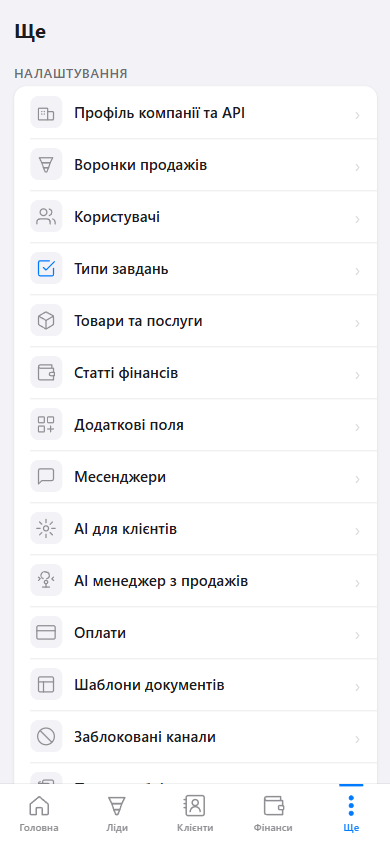
| ⋯ More | All system settings |
🏢 Multiple tenants for one Telegram account
One Telegram account can own several tenants in MyCRM. Useful if you work in multiple companies or want a separate space for testing or personal sales.
- Primary tenant — the one you registered into first or were invited to. Opens via @mycrmtop_bot.
- Additional tenant — you create it yourself, attached to your own Telegram bot from @BotFather. The tenant opens via that bot.
- Rule: one Telegram bot = exactly one tenant. Switching = opening the corresponding bot.
- Management: @mycrmtop_bot → More → My tenants. Create new, refresh token, delete tenant from there.
➕ Create an additional tenant
Step 1 — create a bot in BotFather:
- Open @BotFather.
- Send
/newbot. - Enter display name (e.g. "Acme Sales").
- Enter username (must end in
bot). - BotFather gives you an HTTP API token like
123456789:AAABBBCCC.... Copy it.
Step 2 — create the tenant in MyCRM:
- Open @mycrmtop_bot → More → My tenants → "Create additional tenant".
- Fill in: company name, timezone, language, token.
- Click "Create tenant". MyCRM verifies the token and configures the bot automatically.
- You'll get a link to your bot. Open it — Mini App launches inside the new tenant.
💡 Your token is stored encrypted and never returned in API responses.
⚠️ Bot operation rules and risks
Since the bot belongs to your Telegram account, you're responsible for its state. What not to do:
- Don't delete the bot in BotFather. Webhook stops working. Data stays safe in MyCRM, but access via this bot is lost.
- Don't regenerate the token in BotFather yourself. Use the "Update token" button in MyCRM — we'll re-register the webhook automatically.
- Don't change Menu Button or webhook manually. Auto-monitoring restores it within 10 min, but during that time the bot won't work.
- Don't share the token. Token = full control of the bot.
- Watch the status in My tenants. ✅ — OK, ⚠️ or 🔴 — fix via "Update token".
🔐 MyCRM polls each bot every 10 min (getMe + getWebhookInfo). Webhook drift is self-healed.
🛠️ If something happened to your bot
Your tenant data lives in our database and does NOT depend on the bot's state. Even if the bot is destroyed, all contacts, leads, messages, settings are safe.
1. Token regenerated in BotFather
- @mycrmtop_bot → More → My tenants.
- Click "Update token" next to the problem tenant.
- Paste the new token. Webhook re-registers automatically.
2. Bot deleted in BotFather
- Create a new bot in @BotFather (can have a different name).
- @mycrmtop_bot → My tenants → "Update token".
- Paste the new bot's token. It will be attached to the same tenant.
3. Token leaked — suspect compromise
- BotFather →
/mybots→ bot → API Token → Revoke current token. - Copy the new one.
- @mycrmtop_bot → "Update token" → paste.
4. Want to delete a tenant
- @mycrmtop_bot → My tenants → select → "Delete".
- Confirm. Bot detaches, tenant soft-deletes.
5. Forgot which bot is which tenant
@mycrmtop_bot → My tenants — shows all with names, bot usernames and statuses.
6. Telegram banned your bot
Out of our control. Contact @BotSupport. Meanwhile create a new bot and reattach via "Update token".
💾 @mycrmtop_bot is always available — it's our bot, doesn't depend on you. Even in the worst case you have an entry point to My tenants.
👥 Contacts
Contacts are your clients, partners, suppliers, and anyone else you interact with. You can link leads, tasks, chats, and documents to each contact.
How to Add a Contact🔗
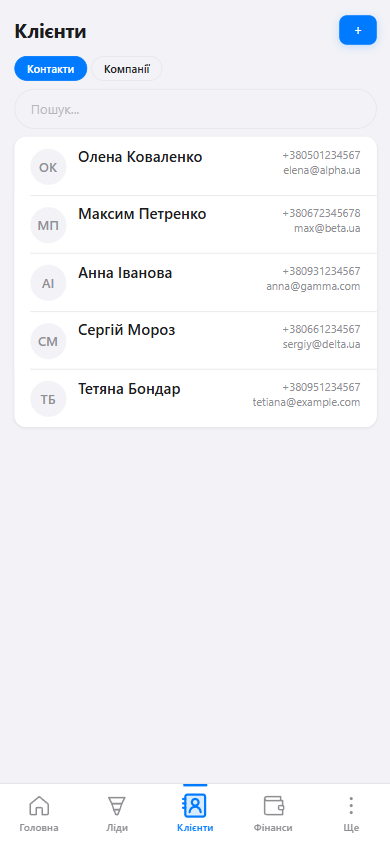
- "+" button — add new contact
- Contacts / Companies tabs
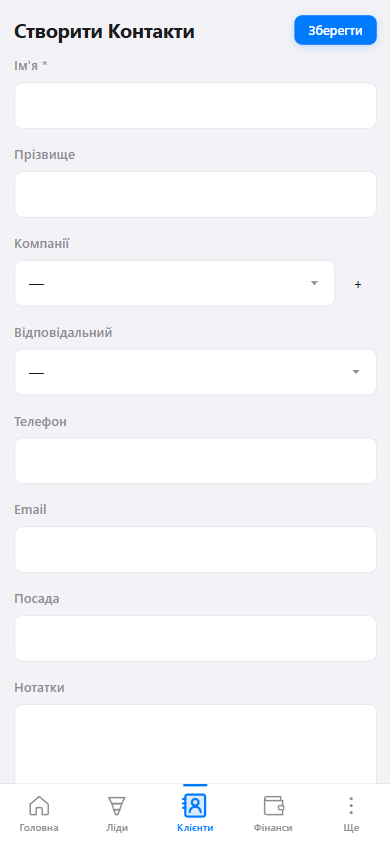
- "Save" button
- 1Go to the Clients section (bottom bar)
- 2Press the "+" button in the top right corner
- 3Fill in the form fields (only First Name is required)
- 4Press "Save"
Contact Fields
| Field | Description | Required |
|---|---|---|
| First Name | Client's name or alias | ✅ |
| Last Name | Last name | — |
| Company | Link to a company | — |
| Phone | Phone number in any format | — |
| Email address | — | |
| Position | Position in the company | — |
| Notes | Free-form text | — |
| Assigned To | Manager responsible for the client | — |
Contact Card🔗
Click on a contact in the list to open their card. It contains all information: details, related leads, tasks, chats, and documents.
To edit a contact — press the ✏️ icon in the top right corner of the card.
Contact Search🔗
The "Clients" section has a search bar. The system searches by:
- First and last name
- Phone number
- Email address
- Company name
Just start typing — the list filters in real time.
Finding and Merging Duplicates🔗
The system helps you find duplicate contacts or companies and merge them.
Go to More → Duplicates:
- Search by phone — compares the last N digits (default is 7)
- Search by email — exact match
- Merge — select duplicates and press "Merge". All data (chats, leads, tasks, finances) will be transferred to the primary contact
Custom Fields🔗
Add your own fields to contacts, companies, and leads to store business-specific information.
Go to More → Custom Fields:
- Entity type — select a tab: Leads, Contacts, or Companies
- Field type — Text, Number, Money, Select, Multi-Select, Checkbox
- Required — you can specify at which pipeline stages the field is required
💼 Leads & Deals
A Lead is a potential deal or sale. Each lead is linked to a contact and moves through the sales pipeline stages from "New" to "Won" or "Lost".
Create a Lead🔗
- "+" button — new lead
- Pipeline selector
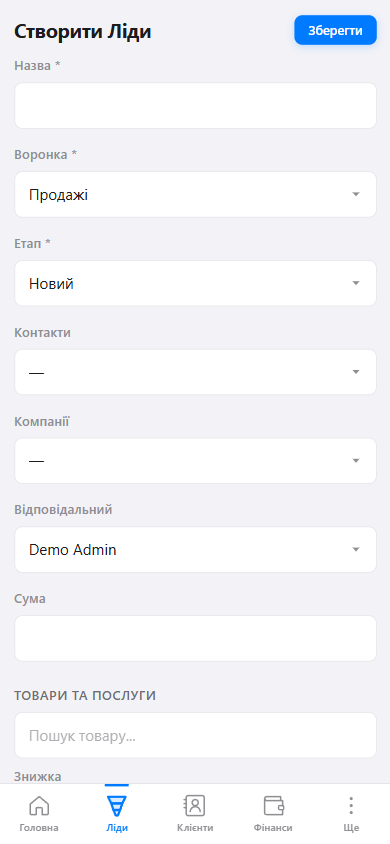
- 1Go to the Leads section
- 2Press "+"
- 3Enter the deal Title (e.g., "Website development for Alpha")
- 4Select a Pipeline and Stage
- 5Optionally: link a contact, specify the amount and assignee
- 6Press "Save"
Sales Pipeline🔗
A sales pipeline is a set of stages that each deal goes through. You can customize your own stages.
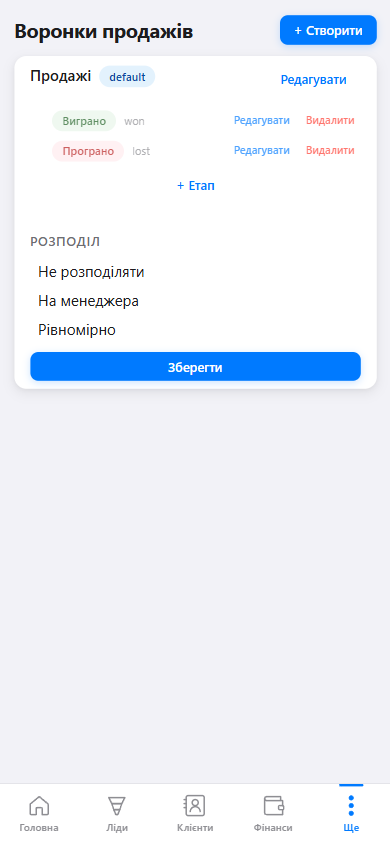
The default stages are:
- New — freshly received lead
- In Progress — actively being worked on
- Negotiation — discussing terms
- Won — deal closed successfully
- Lost — deal did not happen
To move a lead to another stage — open the lead and change the value in the "Stage" field.
Products & Catalog🔗
Manage a catalog of products and services. Products can be added to leads — the client-facing AI automatically sees the catalog and can tell customers about your products.
Go to More → Products:
- Name — product or service name
- SKU — unique product code
- Purchase price — cost price
- Selling price — price for the customer
Lead Distribution🔗
Automatic distribution of new leads among managers. Configured separately for each pipeline.
Go to More → Sales Pipelines → select a pipeline:
- Disabled — new leads are assigned to the administrator
- Single manager — all new leads go to one selected person
- Round Robin — leads are distributed in turn among selected managers
✅ Tasks & Reminders
Tasks help you remember important actions: calling a client, a meeting, sending documents. At the scheduled time, the bot will send you a reminder directly in Telegram.
- ✏️ icon — mark as completed
How to Create a Task🔗
- 1On the Home page, press the "+" button next to "TASKS"
- 2Or open a lead/contact → "Tasks" tab → "+"
- 3Enter the task name
- 4Set the date and time
- 5Select the assigned manager
- 6Save
Reminders🔗
When the due time arrives, the bot sends a message with buttons:
- ✅ Done — task is closed
- Postpone — choose for how long (30 min, 1 hour, 1 day)
Task Types🔗
Create your own task types to classify your team's activities.
Go to More → Task Types:
- Name — for example: Call, Meeting, Email, Demo
- Icon — choose from a set of emojis for visual distinction
- Default — the type that is automatically selected when creating a task
💬 Chats & Messengers
MyCRM collects messages from clients across all connected messengers in one place. You reply directly from the CRM, and the client receives the response in their messenger.
Supported Platforms
- 📱 Telegram — via your own bot
- 💚 WhatsApp — via WAHA or Business API
- 📸 Instagram — Direct Messages via Facebook API
- 💬 Facebook Messenger — via Facebook API
- 🎵 TikTok — via TikTok Business API
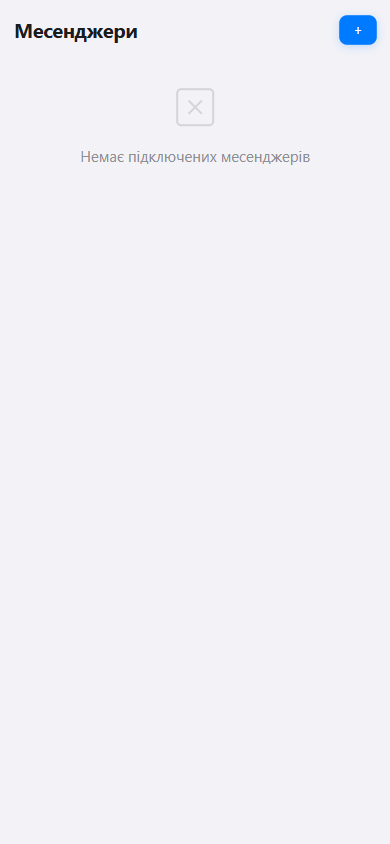
Connect a Telegram Channel🔗
To receive messages from clients via Telegram, you need your own bot.
- 1Open Telegram and find @BotFather
- 2Send the command
/newbot - 3Enter the bot name (visible to clients)
- 4Enter the bot username (must end with
_bot) - 5BotFather will provide a token — copy it
- 6In CRM, go to: More → Messengers → "+"
- 7Select Telegram, paste the token, and save
Connect WhatsApp🔗
MyCRM supports WhatsApp via WAHA (WhatsApp HTTP API) — a free solution for connecting a personal number.
- 1Install and run WAHA (instructions at waha.devlike.pro)
- 2In CRM: More → Messengers → "+"
- 3Select WhatsApp
- 4Enter the WAHA server address and API key
- 5Scan the QR code with WhatsApp on your phone
Connect Instagram🔗
- 1In CRM: More → Messengers → "+" → Instagram
- 2Press "Authorize via Facebook"
- 3Log in to your Facebook account and grant permissions
- 4Select the Instagram account and save
Connect Facebook Messenger🔗
- 1In CRM: More → Messengers → "+" → Facebook Messenger
- 2Press "Authorize via Facebook"
- 3Log in to your Facebook account and grant page management permissions
- 4Select a Facebook Page from the list and save
Connect TikTok🔗
TikTok lets you receive Direct Messages of your TikTok account in CRM and reply from there. The connection takes ~30 seconds (or up to 3 minutes if you're registering with TikTok For Business for the first time — this is one-time).
- TikTok account in Business mode. In the TikTok app: Profile → ☰ → Settings and privacy → Account. If it says "Switch to Business Account" — tap it and complete the short onboarding (1 min, free). If it already says "Switch to Personal Account" — you're already on Business.
- Region. TikTok Direct Messages API is not available for business accounts registered in the US, EEA, Switzerland, UK (TikTok's restriction, not ours).
Standard path (4 steps)
- 1In CRM open More → Messengers → "+" → TikTok. Press "Connect". A new tab with TikTok login opens.
- 2Sign in to your TikTok account (TikTok username + password, or via QR code in the mobile app).If you see a TikTok For Business page with Email/Password fields — don't fill them. Scroll down and press the black "Log in with TikTok" button — that's the right login.
- 3On the screen "…wants additional access to your TikTok account" make sure the right TikTok account is shown at the top (if not — "Switch account"). Press "Continue".
- 4On the final permissions screen press "Confirm". The Business Messaging section should have ticks: Read / Send / Auto Message Setting. The browser returns the tab with "✅ TikTok connected!". You can close that tab — the channel in CRM is active already.
If you don't have a TikTok For Business account yet (first time only)
Between steps 3 and 4 TikTok may ask you to create a TikTok For Business account (free, required for Direct Messages API). Steps:
- AChoose the top card "Create a new TikTok For Business account". Email field — your email (the same as your TikTok email is convenient). Send Code → enter the code from email → tick "…agree to TikTok Commercial Terms…" → Confirm.
- BTikTok shows two formal dialogs (required from everyone):
- "Politics, Governments, and Elections Advertising Policy" → tick → Confirm.
- "Anti-Discrimination Ad Policy" → both ticks (usually already on) → Accept.
You will then automatically continue to step 4 of the standard path. Subsequent connections won't show these forms.
- Supported: text and images.
- Not supported: video, audio, files (TikTok API limitation).
- 48-hour reply window: you can reply only within 48 hours of the client's last message. The first message always comes from the client — TikTok's anti-spam rule.
If something goes wrong
- "Account doesn't exist" on TikTok For Business login — press the black "Log in with TikTok" button at the bottom, don't type email into the form at the top.
- "Failed to connect TikTok" in CRM — the connection took more than 5 minutes and the TikTok code expired. Start over — the TFB forms won't appear since the account is already created.
- Inbound DMs not arriving — the client must write first. Client first → you reply. TikTok rule.
- Outbound not sending — check the 48-hour window. If the client hasn't messaged for over 48 hours, they need to write first again.
- Other issues — reach out to @MyCRMSupportBot.
Reply Templates🔗
Save frequently used responses as templates — no need to type the same thing to every client.
Go to More → Reply Templates. Create a template with a name and text — it will be available in the chat with a single tap.
Blocked Channels🔗
If spammers or unwanted contacts are messaging you — you can block them.
Go to More → Blocked Channels:
- Find the contact via search
- Expand the contact to see all their channels (Telegram, WhatsApp, etc.)
- Block the desired channel — messages from it will no longer be received
Unanswered Message Reminders🔗
The CRM automatically tracks client messages that no one has replied to. If a manager hasn't responded within the set time — they will receive a reminder in the Telegram bot.
Settings: More → Messengers, "Notifications" section:
- Enable/Disable — toggle to activate reminders
- Wait time — how many minutes without a response before sending a reminder (default is 15 minutes)
Recurring Reminders
You can enable recurring reminders so the manager receives a notification every N minutes until they reply to the client:
- Repeat reminders — toggle to enable recurring notifications
- Repeat interval — how often to repeat (from 5 to 1440 minutes)
"No Reply Needed" Button
When you long-press a chat in the list, a menu appears with the "No Reply Needed" button (shown only for chats with unread messages). After pressing it:
- Recurring reminders for this chat will stop
- The unread badge becomes gray (muted)
- If the client sends a new message — reminders will resume automatically
👨👩👧 Users & Roles
You can invite colleagues to your CRM and assign each one an appropriate role.
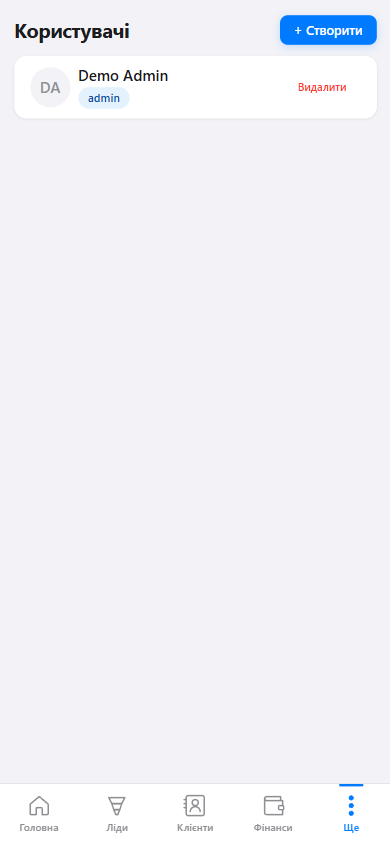
- "+ Create" button — invite a colleague
Roles🔗
| Role | Capabilities |
|---|---|
| Admin | Full access: company settings, users, all data |
| Manager | Work with contacts, leads, tasks, chats |
| Viewer | View-only access, no editing capabilities |
How to Invite a Colleague🔗
- 1Go to: More → Users
- 2Press "+ Create"
- 3Enter the colleague's Telegram username or ID
- 4Select a role
- 5Save — the colleague will receive a message from the bot with CRM access
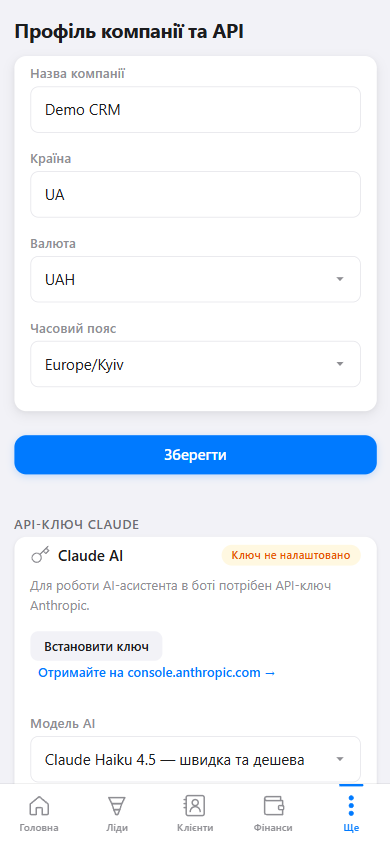
⚙️ Company Profile
Basic CRM settings are located in More → Company Profile & API.
| Setting | Purpose |
|---|---|
| Company Name | Displayed in the bot and reports |
| Country | Determines the phone number format |
| Currency | Currency for financial records and leads |
| Timezone | All dates and reminder times will use this timezone |
🤖 AI Assistant
MyCRM uses Claude AI by Anthropic for two purposes:
- AI for Clients — automatically responds to client messages in messengers
- AI Sales Manager — proactively reminds about leads with no activity
API Key Setup🔗
- 1Go to console.anthropic.com and sign up
- 2In the console, select API Keys → Create Key
- 3Copy the key (starts with
sk-ant-) - 4In CRM: More → Company Profile & API
- 5Find the "Claude API Key" section and press "Set Key"
- 6Paste the key and save
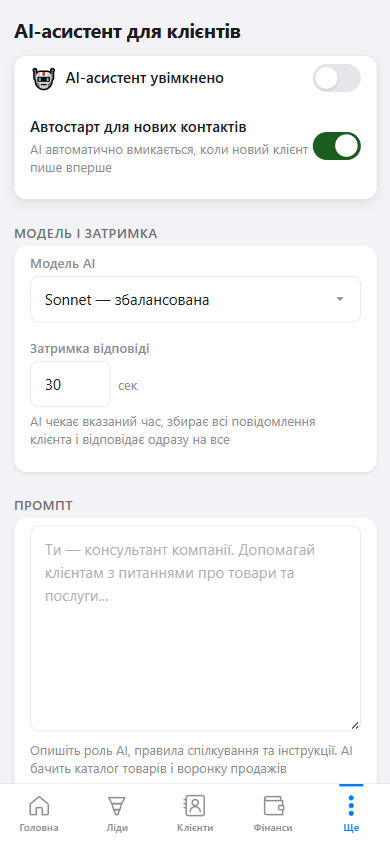
AI for Clients🔗
Go to More → AI for Clients:
- AI assistant enabled — turns on auto-responses
- Auto-start — AI is automatically enabled for new contacts
- AI Model — choose between Haiku (fast), Sonnet (balanced), or Opus (powerful)
- Response delay — wait time before responding (to collect all client messages)
- Prompt — instructions for the AI: who it is, how to respond, what not to discuss
Telegram Bot Notifications🔗
When a client messages via a messenger, the system can send a notification to the assigned manager in the Telegram bot. The notification mode is configured in More → AI for Clients:
| Mode | Description |
|---|---|
| All messages | Every incoming client message triggers a bot notification for the manager. Suitable for small accounts with a few active chats. |
| New contacts only | Notifications are sent only when a new client writes for the first time. Repeat messages from existing contacts do not trigger notifications — the manager sees them in the CRM. Default mode. |
| Only on AI handoff | Notifications are sent only when the AI cannot help the client and hands the conversation over to a live manager. Ideal when the AI handles most requests on its own. |
| Disabled | No bot notifications. The manager works exclusively through the CRM interface. |
Bot Assistant for You🔗
In addition to auto-replies to clients, you can chat with the bot personally — create contacts, leads, tasks, generate documents, and even receive generated PDFs as attachments right in the chat.
Full list of commands and example phrases — see the 💬 AI Bot Commands section.
💰 Finances
The finance section lets you track your business income and expenses.
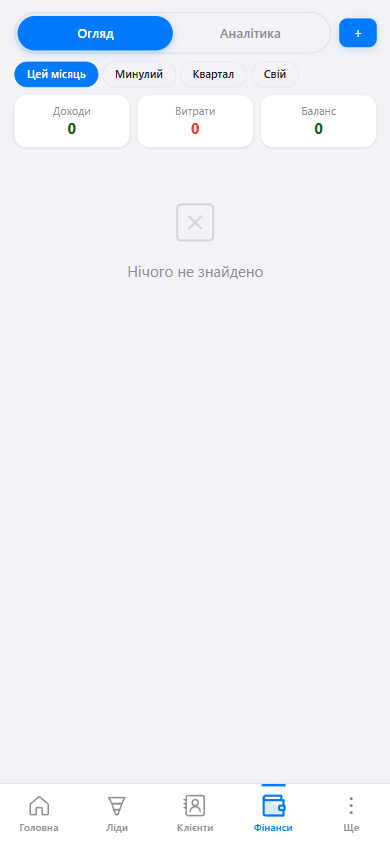
- "+" button — new entry
- Tabs: Overview / Analytics
How to Add a Financial Entry🔗
- 1Go to the Finances section
- 2Press "+"
- 3Select the type: Income or Expense
- 4Enter the amount, category, and date
- 5Optionally link it to a lead
- 6Save
Accepting Client Payments🔗
MyCRM integrates with WayForPay for accepting online payments from clients. When a client pays — the lead is automatically moved to the designated stage.
Go to More → Payments:
- Merchant Account — your WayForPay account
- Merchant Domain — domain linked to WayForPay
- Secret Key — secret key for payment signing
- Auto-move lead — select the stage the lead moves to after payment (configured per pipeline)
- Notifications — the manager and/or admin will receive a Telegram bot notification upon successful payment
Company Details🔗
Company details are used for automatic substitution in document templates (invoices, contracts, acceptance certificates).
Go to More → Company Details:
- Name and legal name
- Tax ID — company registration code
- Phone, email, address
- Banking details — bank name and IBAN
- Signatory — full name and signature image (for documents)
💳 Subscription & Billing
MyCRM operates on a subscription model with pricing based on the number of users in your team.
How the Subscription Works🔗
The subscription price is $10 per user per month. The more users in your team, the higher the total. For example, if you have 3 users — the monthly payment will be $30.
Subscription Statuses
- Trial — free trial period after registration. All features are available without restrictions.
- Active — subscription is paid and valid until the end of the current period.
- Expired — subscription term has ended. Payment is required to continue using the system.
How to Pay🔗
- 1Go to More → Subscription
- 2Select the payment period (1, 3, 6, or 10 months)
- 3Press "Pay"
- 4You will be redirected to the WayForPay payment page
- 5After successful payment, the subscription activates automatically
Bonus Months
When paying for a longer period, you get extra months as a bonus:
- 6 months + 1 month free — pay for 6, use for 7
- 10 months + 3 months free — pay for 10, use for 13
Auto-Renewal🔗
After the first payment, auto-renewal is automatically enabled — the next payment will be charged automatically at the end of the current period.
You can disable auto-renewal on the More → Subscription page by pressing "Disable auto-renewal". In that case, the subscription will transition to "Expired" status when the paid period ends.
Payment History🔗
The subscription page shows a history of all payments at the bottom, including the amount, date, and status (successful or failed).
☁️ File Storage (Google Drive)
MyCRM stores your files (generated PDF documents, templates, chat attachments) on our server with a 1 GB per-account limit. If that's not enough, or you prefer to keep files in your personal Google Drive, connect the integration — all new documents will be saved there.
How it works🔗
- Without connection — files live on our server. 1 GB limit. You'll get warnings in your Telegram bot when approaching the limit (75%, 90%, 100%).
- With Google Drive connected — new generated PDF documents are uploaded straight to your Drive folder (
MyCRM_<ID>). These files are NOT stored on our server at all. - Old files (generated before Drive was connected) remain on our server and stay accessible. They are not migrated automatically.
drive.file — we only see files that the app itself creates under your token. The rest of your Drive (photos, personal documents, other folders) is invisible to us. This is a Google guarantee.
How to connect Google Drive🔗
- 1Open More → 💾 File Storage
- 2Click "Connect Google Drive"
- 3In the popup, choose your Google account (or log in if not signed in)
- 4Google will show a warning: "Google hasn't verified this app". This is expected — MyCRM is in test-mode (up to 100 users) and hasn't gone through full Google verification yet. Click "Continue"
- 5On the permissions screen, check "See, edit, create, and delete only the specific Google Drive files you use with this app", click "Continue"
- 6The popup will auto-close, the card will refresh — Google Drive is connected ✅


What you'll see after connecting🔗
The Storage card will display:
- Account email — so you know which Google Drive you connected to
- Folder link —
https://drive.google.com/drive/folders/<id>. Click it to jump straight to theMyCRM_<ID>folder in your Drive - Yellow warning block about the consequences of disconnection (important to read before disconnect)
- "Disconnect Google Drive" button


What happens on disconnect (IMPORTANT)🔗
- Files remain in your Drive — they're yours, we don't touch them. In your Google account, the
MyCRM_<ID>folder and all PDFs inside will stay untouched. - The CRM will lose access to those files — trying to download an old PDF from a lead card will return error 404 "PDF file not found".
- To restore access — reconnect the same Google account. Connecting a different account will NOT restore access to old files (due to Google OAuth-scope technical constraints).
- If you plan to change accounts — first download the important PDFs to your computer via lead cards (while the old account is still active), then disconnect.
The confirmation dialog when clicking "Disconnect" duplicates this warning in two steps — accidental disconnection is impossible.
1 GB limit (without Drive connected)🔗
If Google Drive isn't connected, your account is limited to 1 GB of local storage on our server. The system is designed to warn you well in advance:
- 75% used — soft message in Telegram bot: "Storage is 75% full. Connect Google Drive for unlimited space"
- 90% — urgent message showing remaining MB
- 100% — new uploads blocked with a CTA to connect Drive or delete old files
FAQ🔗
❓ What if I change my Google account — will the old files be accessible?
No. See the "Disconnect Google Drive" section — old files in the old Drive will remain, but the CRM won't see them. Download the PDFs you need before changing accounts.
❓ Why does Google say "Google hasn't verified this app"?
MyCRM is currently in test-mode (up to 100 users) without full Google verification. We'll go through verification once we have more active tenants. For test users (you), everything is safe — Google has added you to the trusted list.
❓ Is Google Drive free?
Google provides 15 GB of free space per account (shared with Gmail and Google Photos). For our use case (PDFs usually 50-300 KB) this is enough for thousands of documents.
❓ What if Google Drive is unavailable (network or block)?
If upload to Drive fails for any reason, MyCRM automatically saves the file to local disk as a fallback. You won't lose the document.
📄 Document Templates
MyCRM can automatically generate documents — contracts, invoices, acceptance certificates — based on DOCX templates with client and deal data substitution.
Uploading a Template🔗
- 1Prepare a DOCX file with variables in the format
{{variable_name}} - 2Go to: More → Document Templates → "+"
- 3Enter the template name and upload the file
- 4Save
Generating a Document🔗
- 1Open the lead card
- 2Go to the "Documents" tab
- 3Press "Create Document" and select a template
- 4Review the substituted data
- 5Download the finished PDF or DOCX
{{contact_name}}, {{contact_phone}}, {{lead_title}}, {{lead_amount}}, {{company_name}}, {{date}}, and more.
Correct placeholder format for custom fields🔗
Custom fields are accessible in templates via the contact_cf, company_cf, lead_cf dictionaries. Syntax depends on the field name:
- Field without spaces or special characters (e.g.
Telegram) — dot syntax works:{{ contact_cf.Telegram }} - Field with a space in the name (e.g.
Primary Contact) — MUST use bracket syntax with quotes:{{ company_cf['Primary Contact'] }}
{{ company_cf.Primary Contact }} (dot syntax with a space), generation will fail with TemplateSyntaxError. The AI bot will show the exact problem location in the error message.
If the DOCX file is missing from disk🔗
After server updates or data migrations, it may happen that a CRM record ("Invoice 1", "Act") still exists but the physical DOCX file is missing from disk. The system detects this:
- In the template list, the green "DOCX" label is replaced by a red badge
⚠ File missing on disk - In the template edit form — a red warning block with a prompt to re-upload
- If you ask the AI bot "generate invoice 1", it returns a clear message: "DOCX file for template 'Invoice 1' is missing from disk. Open Settings → Document Templates and re-upload the DOCX file"
The fix is simple — open the template in settings, click "Choose file", select the DOCX, save. The CRM record updates, generation works again.
Generate documents via AI bot🔗
Instead of opening the lead card in the mini app, you can just ask the AI bot in Telegram — full instructions and example phrases in the 💬 AI Bot Commands section.
💬 AI Bot Commands
Besides using AI for auto-replies to your clients (see 🤖 AI Assistant), you can chat with the bot for yourself — create contacts, leads, tasks, generate documents, all via voice or text in Telegram. Here's what it can do.
- Client AI — replies to your clients in messengers when you're offline. Configured in More → Client AI.
- Internal AI (Bot Assistant) — helps you work with the CRM via Telegram. Always active, just write to the bot chat.
Basic commands🔗
Write to the bot in natural language (Ukrainian, Russian, or English). Examples:
| What you want to do | Example phrase |
|---|---|
| Create a contact | "Create contact John Smith phone 18001234567 email john@example.com" |
| Create a lead | "New lead Acme Corp for 20000 USD in Sales pipeline" |
| Set a task | "Schedule me a call tomorrow at 10 AM about Smith" |
| Mark chat as resolved | "Mark chat with Smith as no reply needed" — stops unanswered-reminder notifications for this contact |
| Append data to a contact field | "Add @john_work to John's telegram field" — saves as old_value; @john_work |
| Replace a field value | "Change John's telegram to @john_new" — overwrites |
| Status check | "How many tasks do I have today?" / "Show leads in Sales pipeline" |
; ), and "replace" / "заміни" / "замени" / "change to" as overwrite. If a phrase is ambiguous (e.g. "put telegram @john"), the bot will ask for clarification.
Generating documents via the bot🔗
This is one of Internal AI's key features — you can ask the bot to generate a PDF from a template, and it will:
- Find your template by name (e.g. "Invoice 1")
- Gather current data from the lead (contact, company, products, total, tax, discount, number, date)
- Generate the PDF
- Attach the PDF right in the chat as a file — you can forward it to the client with one tap
- Save a copy in the lead's Documents section (locally or in your Google Drive, if connected)
Prerequisites🔗
- In Settings → Document Templates, an active template with an uploaded DOCX
- Template has correctly formatted placeholders (see Placeholder Format)
- The lead has products added (if the template is an invoice/act with a total)
Correct phrases🔗
- "Generate invoice 1 for lead 60" (lead number)
- "Create document from template Act for lead 'Acme Corp 6mo'" (quoted lead name)
- "Generate Invoice 1 for lead acme corp" (natural language)


INV-001, INV-002 ...) auto-increments with every call. This matters for accounting integrity. Don't regenerate a document just to preview it — to view an old document, open the "Documents" section inside the lead card in the mini app.
Important distinction: PDF vs payment link🔗
- PDF document ("Invoice 1" as a template) — a generated document for printing or sending to the client. Say: "Generate invoice 1 for lead...", "Create invoice document..."
- WayForPay payment link (online payment via wayforpay.com) — say explicitly: "Create payment link for lead", "Generate WayForPay link for lead X"
If something doesn't work🔗
The AI bot returns specific errors with instructions:
- "DOCX file for template 'X' is missing from disk" — go to Settings → Document Templates, find this template and re-upload the DOCX.
- "Invalid placeholder in template 'X' near: Y" — you used dot syntax for a field with a space (see Placeholder Format). Fix the DOCX to bracket syntax, re-upload.
- "Template not found" — check the exact name in Settings; write to the bot "what templates do I have?" — it will show the list.

Generation + Google Drive🔗
If you've connected Google Drive, the PDF from the bot is written straight into your MyCRM_<ID> folder in Drive rather than our server. The bot still attaches the file in the Telegram chat — you get it right away as an attachment.
This means: even if your local 1 GB limit is full, document generation keeps working — files go to Drive (15 GB of free Google Drive is enough for thousands of documents).
If you disconnect Google Drive — subsequent new documents write locally again (subject to the limit).
📥 Export & Import🔗
Transfer data from another CRM or create a backup.
Go to More → Export/Import:
Export to XLSX🔗
Export all data (contacts, companies, leads) to an Excel file. Convenient for analysis or migration to another system.
Import from XLSX🔗
- 1Download the XLSX template — press the "Download Template" button
- 2Fill the file with your data (contacts, companies, leads — each on a separate sheet)
- 3Upload the completed file to the CRM
- 4The system will show the result: how many records were created and whether there were any errors
Backup (SQLite)🔗
Create a full backup of all data in SQLite format. You can upload it back later for restoration.
👤 Personal Settings🔗
My Profile🔗
Go to More → My Profile:
- Interface language — Ukrainian, Russian, or English. Changes the language of all CRM elements
- AI assistant language — the language in which the AI bot communicates with you in Telegram. Supports 40+ languages
Feedback🔗
Have an idea or found a bug? Go to More → Feedback:
- Type — Suggestion, Bug, or Other
- Message — describe what you want to improve or what isn't working
Your feedback goes directly to the development team.
❓ Frequently Asked Questions
How do I revoke a manager's access?🔗
Go to More → Users, find the user, and press "Delete". The user will no longer be able to access the CRM.
What should I do if the bot isn't responding?🔗
Check the following:
- Whether the bot token is correctly entered in the messenger settings
- Whether the bot is active in @BotFather (command
/mybots) - Whether the client has blocked the bot
If the problem persists — contact support via @mycrmtop_bot.
How many users can I add?🔗
The number of users depends on your subscription plan. Details on the pricing page.
How do I transfer data from another CRM?🔗
Go to More → Import/Export. MyCRM supports importing contacts and leads from CSV files.
Is my data preserved when changing plans?🔗
Yes. All your data is preserved regardless of your subscription plan. Only access to certain features changes.
How do I delete my account?🔗
Contact support via the bot @mycrmtop_bot. Account deletion is irreversible — all data will be permanently removed.
What happens during a system update?🔗
MyCRM updates automatically, without requiring any action on your part. During an update:
- You will see an "Updating the system" page with an estimated wait time (10–30 seconds)
- The page will refresh automatically when the system is ready — no need to press anything
- Your data is safe — updates do not affect stored information
AI is not responding to clients — what should I do?🔗
Make sure that:
- The Claude API key is set in Company Profile → Claude API Key
- The "AI assistant enabled" toggle is turned on in AI settings
- AI is enabled for the specific contact (toggle in the contact card)
- A prompt is written in the AI settings